経緯
CoreServer core-xを契約し、適当なPHPを書いてみたが、core-xにデフォルトで備わっているviだとシンタックスが有効にならない・・・。 ってかそもそもviにsyntaxが入っていないよう。(syntax が – になっている)
機能的には最低限のviみたい。
> vi --version
VIM - Vi IMproved 8.0 (2016 Sep 12, compiled Mar 16 2022 02:51:40)
Included patches: 1-1763
・・・

-ebcdic            -mouse             -statusline        -xsmp
-emacs_tags        -mouse_dec         -sun_workshop      -xterm_clipboard
-eval              -mouse_gpm         -syntax            -xterm_save
+ex_extra          -mouse_jsbterm     +tag_binary
・・・

>
最終的にはGitからpullしてくることがほとんどだと思うので、たいしてviを使うこともないだろうし、そのままでも良いかと思ったけど、出来ればシンタックスが有効になっってくれるとありがたいなぁと思い、viをローカルにインストールし、syntaxを効かせることが出来るか試してみた。
環境
・CoreServer core-x
参考サイト
要約
以下のコマンドでインストール、bashrc、vimrcを設定すれば出来た。
■vimのインストール
> mkdir -p ~/local          # ローカルvimの置き場
> mkdir -p ~/work/vim_src   # 一時作業ディレクトリ
> cd ~/work/vim_src


> wget ftp://ftp.vim.org/pub/vim/unix/vim-8.1.tar.bz2
> bzip2 -d ./vim-8.1.tar.bz2
> tar xf ./vim-8.1.tar
> ./configure --enable-multibyte --enable-xim --enable-fontset --with-features=big --prefix=$HOME/local
> make
> make install
■~/.bashrc
alias vim='~/local/bin/vim -u ~/.vimrc'■~/.vimrc
set nocompatible
set backspace=indent,eol,start
syntax on
設定手順
参考サイトを見て、同じ手順で出来そうに思ったので、以下の手順で行った。
■1.viのソースインストール
viの公式サイトよりファイルをダウンロードする。
Vim the editor – Vim source archives
最新バージョンは、8.1? よく分かっていないが、”All Files”となっているもののリンクを取得。
取得したリンクをもとに、ダウンロードを行う。
mkdir local
mkdir -p ~/work/vim_src
cd ~/work/vim_src
wget ftp://ftp.vim.org/pub/vim/unix/vim-8.1.tar.bz2
■2.configure , make
ダウンロードしたファイルを解凍し、configure ,make を行っていく。
configure の実行時に、prefixを指定し、インストール先を指定しておく。
> bzip2 -d ./vim-8.1.tar.bz2
> tar xf ./vim-8.1.tar
> ./configure --enable-multibyte --enable-xim --enable-fontset --with-features=big --prefix=$HOME/local

configure: creating cache auto/config.cache
checking whether make sets $(MAKE)... yes
checking for gcc... gcc
checking whether the C compiler works... yes
checking for C compiler default output file name... a.out
checking for suffix of executables...
・・・
configure: creating auto/config.status
config.status: creating auto/config.mk
config.status: creating auto/config.h

>
エラーが出ずにconfigureが出来た。
…一応ローカルPCで同じことをやったさいには、以下のようなエラーが出た。(ncursesが足りないみたいに言われた)
なので同じようなエラーが出たら、ここで諦めようと思っていた。
checking for tgetent in -ltermcap... no
checking for tgetent in -lcurses... no
no terminal library found
checking for tgetent()... configure: error: NOT FOUND!
      You need to install a terminal library; for example ncurses.
      Or specify the name of the library with --with-tlib.
続けてmakeを行う
> make

Starting make in the src directory.
If there are problems, cd to the src directory and run make there
cd src && make first
make[1]: ディレクトリ '/home/****/work/vim_src/vim81/src' に入ります
/bin/sh install-sh -c -d objects
touch objects/.dirstamp
CC="gcc -Iproto -DHAVE_CONFIG_H       " srcdir=. sh ./osdef.sh
gcc -c -I. -Iproto -DHAVE_CONFIG_H     -g -O2 -U_FORTIFY_SOURCE -D_FORTIFY_SOURCE=1        -o objects/arabic.o arabic.c
gcc -c -I. -Iproto -DHAVE_CONFIG_H     -g -O2 -U_FORTIFY_SOURCE -D_FORTIFY_SOURCE=1        -o objects/beval.o beval.c
gcc -c -I. -Iproto -DHAVE_CONFIG_H     -g -O2 -U_FORTIFY_SOURCE -D_FORTIFY_SOURCE=1        -o objects/buffer.o buffer.c
・・・

cd xxd; CC="gcc" CFLAGS=" -g -O2 -U_FORTIFY_SOURCE -D_FORTIFY_SOURCE=1" LDFLAGS="-L/usr/local/lib -Wl,--as-needed" \
	make -f Makefile
make[2]: ディレクトリ '/home/****/work/vim_src/vim81/src/xxd' に入ります
gcc  -g -O2 -U_FORTIFY_SOURCE -D_FORTIFY_SOURCE=1 -L/usr/local/lib -Wl,--as-needed -DUNIX -o xxd xxd.c
make[2]: ディレクトリ '/home/****/work/vim_src/vim81/src/xxd' から出ます
make[1]: ディレクトリ '/home/****/work/vim_src/vim81/src' から出ます

>
makeも問題無く出来ていそうな感じ。
・・・正直エラーが出ているのかも分からないが、そんなクリティカルな表示が出てないのを見ると出来ていそう。
■3.make install
make が出来たので、install する前にテストを行う。
…一応インストール先がローカルになっているか確認したいこともあったので。
> make -n install

if test ! -f src/auto/config.mk; then \
	cp src/config.mk.dist src/auto/config.mk; \
fi
echo "Starting make in the src directory."
echo "If there are problems, cd to the src directory and run make there"
cd src && make install
make[1]: ディレクトリ '/home/****/work/vim_src/vim81/src' に入ります
/bin/sh install-sh -c -d /home/****/local/bin
chmod 755 /home/****/local/bin
if test -f /home/****/local/bin/vim; then \
  mv -f /home/****/local/bin/vim /home/****/local/bin/vim.rm; \
  rm -f /home/****/local/bin/vim.rm; \
fi
cp vim /home/****/local/bin
strip /home/****/local/bin/vim
chmod 755 /home/****/local/bin/vim
echo >/dev/null
/bin/sh install-sh -c -d /home/****/local/share/vim
chmod 755 /home/****/local/share/vim
・・・

if test -d /home/****/local/share/applications -a -w /home/****/local/share/applications; then \
   cp ../runtime/vim.desktop \
	../runtime/gvim.desktop \
	/home/****/local/share/applications; \
   if test -z "" -a -x ""; then \
       -q /home/****/local/share/applications; \
   fi \
fi
make[1]: ディレクトリ '/home/****/work/vim_src/vim81/src' から出ます

>
処理を見ていると、configureのさいにprefixで指定したディレクトリに対して、色々処理が行われているのがわかる。
このままインストールしても問題無さそうと判断し、installを実行する。
> make install

Starting make in the src directory.
If there are problems, cd to the src directory and run make there
cd src && make install
・・・

make[1]: ディレクトリ '/home/****/work/vim_src/vim81/src' から出ます
インストールされたか確認し、syntaxが有効になっているか確認する。
> cd ~/local/bin
> ls
ex  rview  rvim  view  vim  vimdiff  vimtutor  xxd

> ./vim --version
VIM - Vi IMproved 8.1 (2018 May 18, compiled May 29 2022 22:00:57)
Included patches: 1
・・・

-dnd               +mouse             +startuptime       +xsmp_interact
-ebcdic            -mouseshape        +statusline        +xterm_clipboard
+emacs_tags        +mouse_dec         -sun_workshop      -xterm_save
+eval              -mouse_gpm         +syntax

>
Vimがあること、またsyntax が + になっているので、シンタックスが使えそう。
■4.bashrc , vimrc の設定
とりあえずインストールしたvimが使えるようにbashrcを編集する。
core-xだと、デフォルトだと”vim”コマンドは無いよう(”vi”コマンドのみ)なので、alias で “vim”として指定してみる。
> vi ~/.bashrc


# Uncomment the following line if you don't like systemctl's auto-paging feature:
# export SYSTEMD_PAGER=

# User specific aliases and functions
alias vim='~/local/bin/vim -u ~/.vimrc'  <--追加
保存したら、bashrcを読み直す。
次にvimrcで、nocompatible 、backspace 、syntax を設定する。
> vi ~/.vimrc

set nocompatible    <--追加
set backspace=indent,eol,start    <--追加
syntax on    <--追加
※vimrcにnocompatibleが設定されていないため、bashrcもvimrcも 一先ずviで編集した。矢印キー効かないと駄目な人間なので・・・
■5.syntaxの確認
設定が出来たら、適当にvimrcをvimで開いてみる。
●従来のviで開いた状態
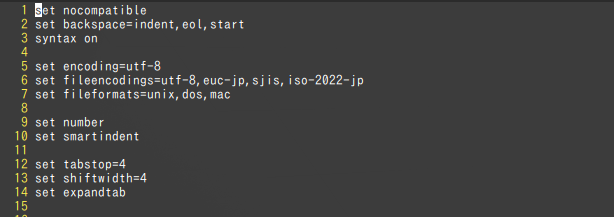
●ローカルインストールしたvimで開いた状態
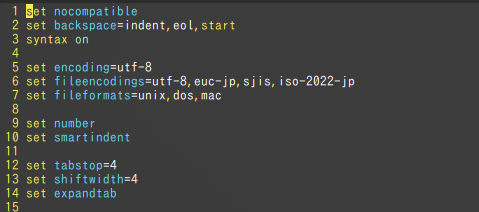
syntaxが効いていて見やすくなった!!
やはり個人的にはviにはsyntaxで色がついてほしいのです^^